Part 1: The Complete Guide to Making Easy Homemade Ice Cream
Why This Easy Homemade Ice Cream Is Worth Making
There is something special about homemade ice cream. A carton from the freezer aisle can certainly satisfy a craving, but making your own gives you a fresher, creamier dessert with a texture and flavor that feels wonderfully indulgent.
The best part is that you don’t need an expensive ice cream machine for this recipe.
This easy homemade ice cream recipe uses a simple no-churn method. Instead of preparing a traditional cooked custard and churning it for a long period, you create an airy whipped-cream base and combine it with sweetened condensed milk. After freezing, the mixture becomes rich, smooth, and scoopable.
With only a few main ingredients, this is also an excellent recipe for beginners. Heavy cream supplies the creamy foundation, sweetened condensed milk provides sweetness and body, and vanilla extract gives the finished dessert its familiar homemade vanilla ice cream character.
You can enjoy it exactly as written or personalize it with chocolate chips, chopped nuts, crushed cookies, or pieces of fruit.
That flexibility makes this recipe especially useful for family desserts, summer gatherings, birthday celebrations, and casual weekend treats.
What Makes No-Churn Ice Cream So Simple?
Traditional ice cream generally involves making a custard or base and then churning it while it freezes. Churning helps break up ice crystals and incorporates air, resulting in a smoother texture.
This recipe takes a much simpler approach.
Whipping the heavy cream before freezing naturally introduces air into the mixture. Sweetened condensed milk then adds sweetness and richness without requiring you to cook sugar into a separate syrup or custard.
Once the two components are gently combined and frozen, you have a creamy no-churn ice cream with surprisingly little hands-on preparation.
There is also no need to monitor an ice cream maker, prepare an egg-based custard, or worry about complicated temperatures.
For home cooks who want a quick dessert without specialized equipment, this method is extremely convenient.
Understanding the Three Main Ingredients
Although the ingredient list is short, each component plays an important role.
Heavy Cream Creates the Creamy Texture
Heavy cream is the foundation of this homemade ice cream.
When cold heavy cream is whipped, its volume increases as air becomes incorporated into the cream. Those tiny air bubbles help create the soft, light texture that makes this ice cream enjoyable straight from the freezer.
For the best whipping results, use the cream cold.
A chilled bowl can also help the cream whip efficiently, particularly if your kitchen is warm.
The goal is to beat the cream until it forms stiff peaks. This means that when you lift the whisk or beaters, the whipped cream should hold its shape instead of immediately collapsing.
Don’t continue whipping unnecessarily once you’ve reached that stage. Overwhipping can make the cream grainy and eventually push it toward a butter-like consistency.
Sweetened Condensed Milk Adds Richness and Sweetness
The second major ingredient is sweetened condensed milk.
Unlike ordinary milk, sweetened condensed milk has already been concentrated and sweetened. That makes it particularly useful in no-churn ice cream because it contributes both sweetness and a thick, creamy consistency.
It also means you don’t need to dissolve granulated sugar separately.
When combined with whipped heavy cream, it creates a rich base that freezes beautifully.
Because sweetened condensed milk is already sweet, there is no need to add additional sugar to this recipe. Keeping the ingredient balance intact helps preserve the intended texture and flavor.
Vanilla Extract Gives the Ice Cream Its Classic Flavor
Vanilla extract may be a small ingredient, but it has an important role.
The vanilla enhances the natural dairy flavors and gives the ice cream a familiar dessert-shop aroma.
Since this recipe contains relatively few ingredients, vanilla is noticeable. Using a good-quality pure vanilla extract can provide a more rounded flavor.
The vanilla doesn’t need to dominate. It should simply add warmth and depth to the creamy base.
The Most Important Step: Whipping the Cream Properly
If there is one technique worth paying attention to, it is whipping the heavy cream.
Start with cold cream and pour it into a large mixing bowl.
Using an electric mixer is the easiest option, although a hand whisk can also work if you’re prepared for a little more effort.
Begin mixing at a moderate speed and continue until the cream becomes visibly thicker.
As you continue, the whisk will begin leaving defined trails through the cream. Eventually, the mixture will form stiff peaks.
You can test it by lifting the beaters.
If the whipped cream forms a peak that stands upright and retains its shape, you’re ready for the next step.
If it looks soft and droopy, continue whipping briefly.
However, avoid walking away while the mixer is running. Cream can change from perfectly whipped to overbeaten surprisingly quickly.
Why Gentle Folding Matters
Once your cream has reached stiff peaks, the preparation becomes more delicate.
Sweetened condensed milk should be incorporated gently rather than beaten aggressively.
The reason is simple: the whipped cream contains air, and that air is valuable.
Those trapped air bubbles help keep the frozen dessert light instead of making it extremely dense.
Use a rubber spatula and gently fold the condensed milk into the whipped cream.
A folding motion involves moving the spatula down through the mixture, scooping underneath, and bringing the heavier ingredients upward.
Turn the bowl as you work.
Continue until the mixture looks evenly combined.
You don’t need to mix it aggressively for a perfectly uniform appearance.
Adding Vanilla Without Losing the Airy Texture
Once the sweetened condensed milk is incorporated, add the vanilla extract.
Fold or gently mix until it is evenly distributed.
At this stage, the mixture should look thick, smooth, and fluffy.
This is also the point where you can introduce your chosen add-ins.
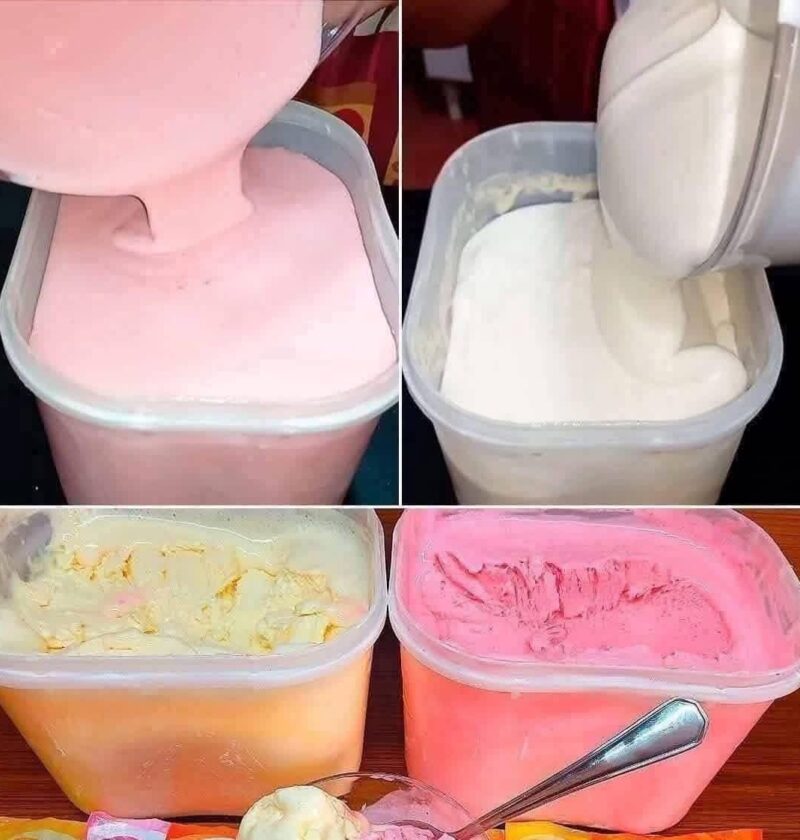
The recipe leaves plenty of room for creativity, so you can make one large batch with a single flavor or divide the mixture into smaller containers and create several variations.
Make It Your Own With Simple Add-Ins
One of the advantages of homemade ice cream is that you can customize it according to what you already have in the kitchen.
Chocolate Chip Ice Cream
Chocolate chips are an easy choice.
For a more interesting texture, use a combination of different-sized chocolate pieces. Smaller chips distribute throughout the mixture, while larger pieces create occasional crunchy bites.
Cookie Ice Cream
Crushed cookies can turn the simple vanilla base into a more indulgent dessert.
Break the cookies into small pieces rather than crushing them into a fine powder. Larger pieces give you recognizable cookie bites throughout the ice cream.
Nutty Ice Cream
Chopped nuts provide a pleasant contrast to the soft frozen base.
Chopped nuts can also make the dessert feel more substantial and add a roasted flavor.
Fruit Ice Cream
Fruit pieces can add freshness and natural color.
Choose pieces that aren’t excessively watery, as extra moisture can affect the frozen texture.
You can fold the fruit directly into the ice cream base before freezing.
Choosing the Right Freezer Container
After preparing the mixture, transfer it to a freezer-safe airtight container.
The container matters more than it might seem.
A good container protects the ice cream from air exposure and helps reduce the formation of unwanted ice crystals.
A shallow, wide container can also make the ice cream freeze more evenly and can make scooping easier later.
Whatever container you choose, make sure it is suitable for freezing and can be sealed securely.
Avoid leaving the mixture uncovered in the freezer.
How Long Should Homemade Ice Cream Freeze?
The recommended freezing time is 4–6 hours, or until the ice cream becomes firm.
Freezer temperatures can vary, so the exact time may differ slightly from one kitchen to another.
The important thing is to judge the texture rather than relying exclusively on the clock.
If the center is still soft and loose, allow additional freezing time.
For convenience, you can also prepare the ice cream ahead of time and let it freeze overnight.
This makes it a practical make-ahead dessert for gatherings.
Why You Should Let It Sit Before Scooping
Homemade ice cream can become quite firm after several hours in the freezer.
Rather than trying to force a spoon through a rock-hard container, let it stand at room temperature for a few minutes before serving.
This short resting period softens the surface slightly and makes scooping much easier.
It also produces more attractive scoops.
If you’re serving the ice cream to guests, this simple step can make a noticeable difference.
How to Get a Creamier Homemade Ice Cream
The texture of no-churn ice cream depends heavily on the whipping and folding stages.
Start with cold heavy cream.
Whip it sufficiently to create stiff peaks.
Don’t overbeat.
Fold in the condensed milk instead of vigorously mixing it.
Finally, store the mixture in a tightly sealed freezer-safe container.
These small details work together to produce the smoothest possible result.
If the finished ice cream seems harder than expected after freezing, allow it to rest for several minutes before scooping.
Serving Ideas for Homemade Ice Cream
This creamy dessert is delicious by itself, but toppings can make it even more enjoyable.
Try serving scoops with chocolate chips, chopped nuts, crushed cookies, or fruit pieces.
You can also combine different toppings for a dessert bar.
Set out bowls of your favorite add-ins and let everyone customize their own serving.
For children, colorful toppings can make homemade ice cream especially appealing.
For adults, simple combinations such as vanilla ice cream with chopped nuts or cookie pieces can create a more sophisticated dessert.
Turn One Recipe Into Several Flavors
Another advantage of this recipe is that you don’t necessarily have to make one single flavor.
Prepare the basic ice cream mixture first, then divide it among several freezer-safe containers.
Add different mix-ins to each portion.
For example, one container can contain chocolate chips, another can contain crushed cookies, and another can contain fruit pieces.
This approach is particularly useful for parties because guests can choose their favorite version.
It also allows you to experiment without changing the basic recipe.
Homemade Ice Cream for Summer Gatherings
Few desserts are more welcome on a hot day than a cold scoop of creamy ice cream.
Because this recipe doesn’t require baking, it family dinner is an excellent easy summer dessert.
You can prepare it earlier in the day and leave it in the freezer until dessert time.
For a casual gathering, serve it with a selection of toppings.
For a birthday celebration, add crushed cookies or chocolate chips.
For a family dinner, a simple scoop of homemade vanilla ice cream can be the perfect ending.
And because the recipe requires only a handful of ingredients, it is convenient when you don’t want to make a complicated dessert.
Common Problems and How to Avoid Them
The Cream Won’t Whip
The cream may not whip properly if it isn’t cold enough or if the mixing bowl is warm.
Use well-chilled heavy cream and, if necessary, chill the bowl and beaters before beginning.
The Ice Cream Is Too Hard
Freezing can make homemade ice cream firm, especially after several hours or overnight.
Allow it to sit at room temperature for a few minutes before scooping.
The Ice Cream Feels Icy
Excessive air exposure or poor storage can contribute to ice crystals.
Keep the container tightly sealed and avoid repeatedly leaving it uncovered in the freezer.
The Texture Is Dense
Overmixing after whipping can remove some of the air that gives this recipe its light texture.
Fold the condensed milk and add-ins gently.
The Add-Ins Sink
Very heavy or large additions can move toward the bottom during freezing.
Use reasonably sized pieces and distribute them evenly through the mixture before placing the container in the freezer.
Storage Tips for Better Frozen Texture
Always store homemade ice cream in an airtight freezer-safe container.
Keep the lid securely closed whenever the ice cream isn’t being served.
Repeated exposure to warm air can encourage ice crystal formation and negatively affect texture.
For the best quality, avoid repeatedly taking the entire container out of the freezer and allowing it to soften before returning it to storage.
Instead, remove only the amount you plan to serve.
Why This Recipe Is Great for Beginners
Some homemade ice cream recipes involve egg yolks, stovetop custards, thermometers, and specialized machines.
This recipe avoids all of that.
You need a mixing bowl, an electric mixer or whisk, a rubber spatula, and a freezer-safe container.
That simplicity makes it an excellent introduction to homemade frozen desserts.
There is also plenty of room to personalize it.
Once you’ve mastered the basic technique, you can experiment with different combinations of the optional chocolate chips, nuts, cookies, and fruit pieces.
The Secret Is Simplicity
The appeal of this easy homemade ice cream recipe isn’t that it uses complicated culinary techniques.
It is almost the opposite.
A few well-chosen ingredients are combined in the correct order, the whipped cream is handled gently, and the freezer does the rest.
The finished dessert is creamy, sweet, and fragrant with vanilla.
Whether you call it no-churn ice cream, homemade vanilla ice cream, or an easy frozen dessert, the basic method is remarkably approachable.
The most important thing is to respect the texture during preparation.
Whip the cream properly, fold rather than beat, freeze in a well-sealed container, and give the finished ice cream a few minutes to soften before serving.
With those simple steps, you can make a satisfying homemade treat without an ice cream machine.
Final Tips for Your Best Batch
For consistently good results, keep the heavy cream cold before whipping.
Stop whipping as soon as stiff peaks form.
Add the sweetened condensed milk gradually and fold gently.
Use vanilla extract to give the base a classic flavor.
If you’re adding chocolate chips, nuts, cookies, or fruit, distribute them evenly.
Use a freezer-safe airtight container and seal it properly.
Allow the ice cream to rest for a few minutes before scooping.
Most importantly, don’t overcomplicate it. The beauty of this recipe is that a short ingredient list and straightforward technique can produce a deliciously creamy frozen dessert at home.
Part 2: Easy Homemade Ice Cream Recipe
Easy Homemade Ice Cream
Prep Time: 10 minutes
Freeze Time: 4–6 hours
Total Time: Approximately 6 hours
Yield: 6–8 servings
Ingredients
- Heavy cream: 2 cups
- Sweetened condensed milk: 1 can (14 oz)
- Vanilla extract: 2 teaspoons
- Optional add-ins: Chocolate chips, chopped nuts, crushed cookies, or fruit pieces
Equipment
- Large mixing bowl
- Electric mixer or hand whisk
- Rubber spatula
- Freezer-safe airtight container
Method
1. Whip the Cream
Pour the cold heavy cream into a large mixing bowl. Beat with an electric mixer or whisk until stiff peaks form.
2. Add the Condensed Milk
Gently fold the sweetened condensed milk into the whipped cream using a rubber spatula. Avoid vigorous stirring so the mixture stays light and airy.
3. Flavor the Base
Add the vanilla extract and gently fold until evenly incorporated.
4. Add Your Favorite Extras
Fold in chocolate chips, chopped nuts, crushed cookies, or fruit pieces if desired.
5. Freeze
Transfer the mixture to a freezer-safe airtight container. Smooth the top and seal the container securely.
6. Chill Until Firm
Freeze for 4–6 hours, or until completely firm. For a firmer texture, allow it to freeze overnight.
7. Scoop and Serve
Remove the container from the freezer and let the ice cream stand for a few minutes. Scoop and serve with your favorite toppings.
Serving Suggestions
Enjoy this creamy homemade ice cream on its own or top it with chocolate chips, chopped nuts, crushed cookies, or fresh fruit.
Storage
Keep the ice cream covered tightly in the freezer to help maintain its creamy texture and protect it from freezer odors.